ESP32の安い基板を見つけたので、まずはHello World。
開発環境はplatformioを使用する。
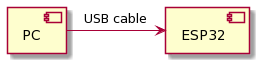
部品
ソフトウェア開発
環境構築
1
$ pio project init -b nodemcu-32s
Hello Worldの実装とFW転送
src/main.cppを実装する
1
2
3
4
5
6
7
8
9
10
11
#include <Arduino.h>

void setup()
{
    Serial.begin(115200);
    Serial.println("Hello ESP32 World!");
}

void loop()
{
}
FWを転送する。以下のようにSUCCESSが表示されてなければ、ビルドに失敗しているかFW転送に失敗している。
1
2
3
4
5
6
7
8
9
10
$ pio run --target upload
...
Writing at 0x00024000... (85 %)
Writing at 0x00028000... (100 %)
Wrote 216720 bytes (109886 compressed) at 0x00010000 in 2.8 seconds (effective 630.0 kbit/s)...
Hash of data verified.

Leaving...
Hard resetting via RTS pin...
========================= [SUCCESS] Took 14.06 seconds =========================
Hello Worldの動作確認
boudrateのデフォルトが9600なので設定を変更する。
platformio.ini
1
2
3
4
5
6
7
8
9
diff --git a/platformio.ini b/platformio.ini
index 75725ee..827a3e3 100644
--- a/platformio.ini
+++ b/platformio.ini
@@ -12,3 +12,4 @@
 platform = espressif32
 board = nodemcu-32s
 framework = arduino
+monitor_speed = 115200
ついでに.gitignoreを変更しておく。
1
2
3
4
5
6
7
8
9
10
11
12
13
14
15
16
17
18
19
diff --git a/.gitignore b/.gitignore
index 259148f..c167d4e 100644
--- a/.gitignore
+++ b/.gitignore
@@ -30,3 +30,14 @@
 *.exe
 *.out
 *.app
+
+# Other libs
+.pio
+
+# for Editor
+*~
+GTAGS
+GPATH
+GRTAGS
+.emacs.desktop
+.emacs.desktop.lock
以下のように表示されてればOK。
1
2
3
4
$ pio device monitor
...
0080400,len: 0x400806ac
Hello ESP32 World!